WeatherOptics MCP Beta Setup
Wire the WeatherOptics MCP server into ChatGPT or Claude so you can ask natural-language questions about weather risk, forecasts, routes, and severe weather for your asset locations — including inline maps.
Before you start
You need:
- A ChatGPT or Claude account — any plan works, including Free.
- Your WeatherOptics login (the email + password you use for the portal). There's no token to copy — you'll sign in with WeatherOptics during setup and choose exactly which capabilities to share.
1 Enable Developer Mode
Open ChatGPT → Settings → Plugins → Advanced. Turn on Developer mode.

ChatGPT will warn you this is elevated risk — that's expected. Confirm to enable.
2 Create the plugin
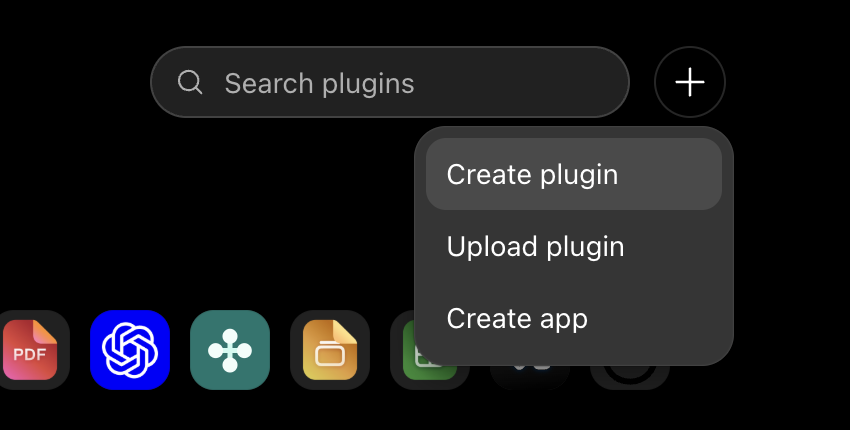
Open the Browse Plugins
page (chatgpt.com/plugins) and click the plus
(+) button at the top right, next to the plugin search
bar.

From the menu, choose Create app (not "Create plugin" or "Upload plugin").
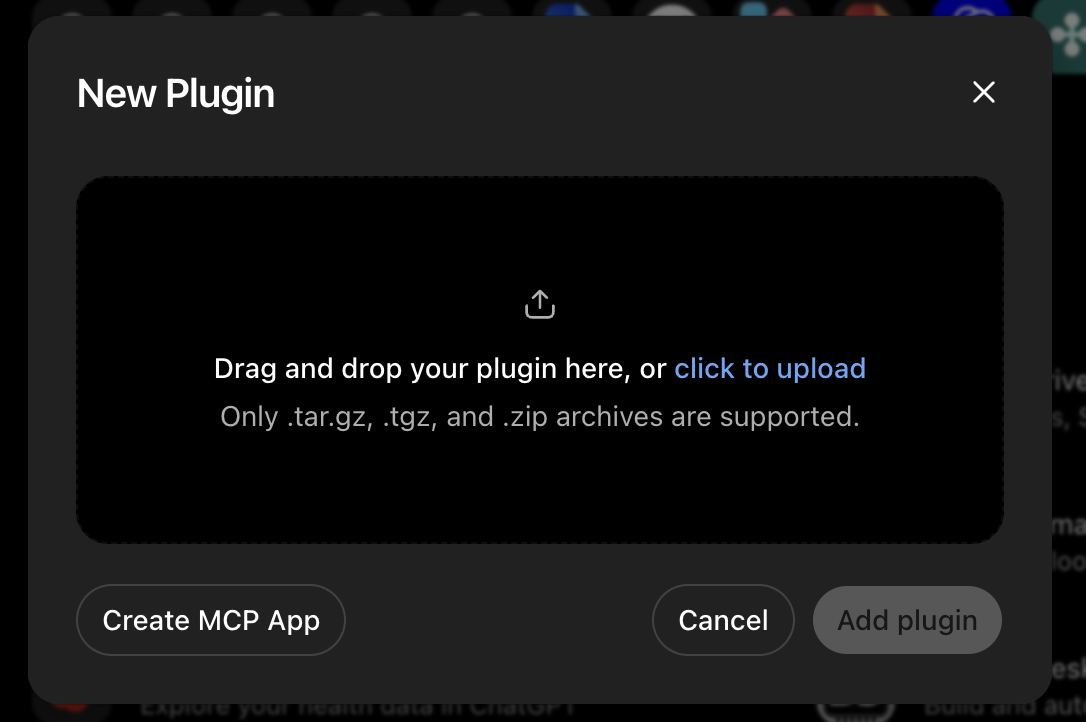
A New Plugin dialog opens with an area for uploading a plugin archive. Skip that and click Create MCP App at the bottom left.
Fill in the form like this:
- Name
- WeatherOptics MCP
- Description
- optional — e.g. "7-day weather risk for asset locations"
- Connection
- Server URL
- Server URL
- https://mcp.weatheroptics.co/mcp
- Authentication
- OAuth
- Risk checkbox
- Check "I understand and want to continue"
https://mcp.weatheroptics.co/mcpClick Create.
3 Connect your WeatherOptics account
Click Connect on the plugin. A WeatherOptics sign-in page opens: enter your login email + password, then choose which capabilities to share with ChatGPT — weather & risk data, route planning, and/or your saved assets. You can grant everything or just a subset.
Once connected, all WeatherOptics tools appear under Actions. A tool whose permission you didn't grant doesn't fail silently — it replies with a short explanation of which permission it needs. What each tool does is documented on the tools reference page. To change what's shared later, disconnect and reconnect the plugin — the permission picker runs again. Permissions your WeatherOptics administrator changes apply within about a minute, no reconnect needed.
4 Test it in a new chat
Open a new chat, attach an asset CSV (or just name a place), and ask:
Using WeatherOptics, which of my attached warehouses are at risk over the next 7 days?Maps render directly inline in the chat — try:
Using WeatherOptics, show me an interactive road-risk map around Chicago.Getting updates
Whenever the WeatherOptics team ships a server update, refresh the plugin so ChatGPT picks it up: Settings → Plugins → the WeatherOptics plugin → scroll down past the tool listings to the "Information" section (the one showing "Connected on" and the server URL) → click Refresh at the top right of that section.
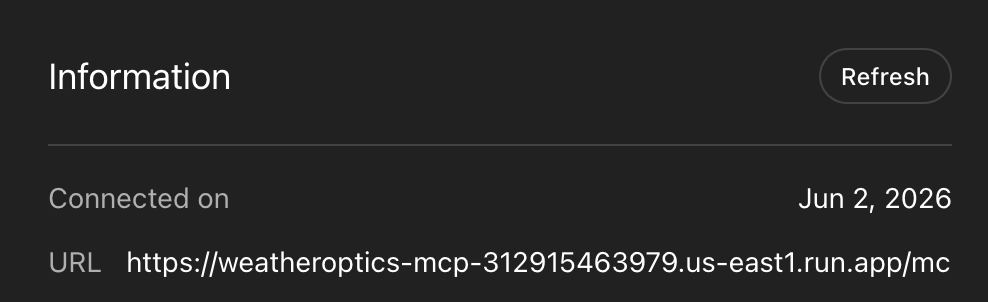
This matters especially for the inline map: ChatGPT caches the map widget template the first time it fetches it and reuses it across chats, so widget changes do not appear until you do this refresh.
1 Open Customize → Connectors
In Claude, click Customize in the left sidebar, then the Connectors tab. Click Add at the top right, then Add custom connector.

2 Enter the name and URL
Fill in the first screen, then click Continue:
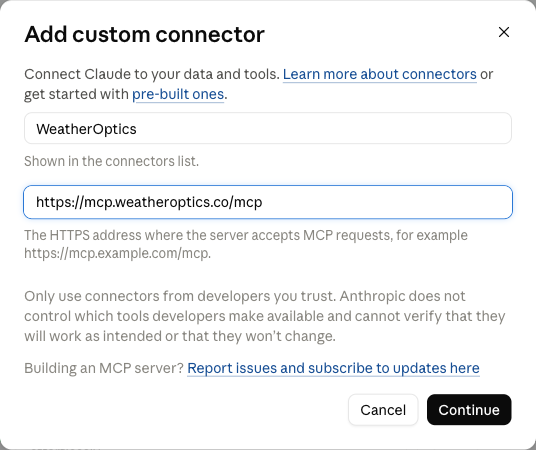
- Name
- WeatherOptics
- MCP server URL
- https://mcp.weatheroptics.co/mcp
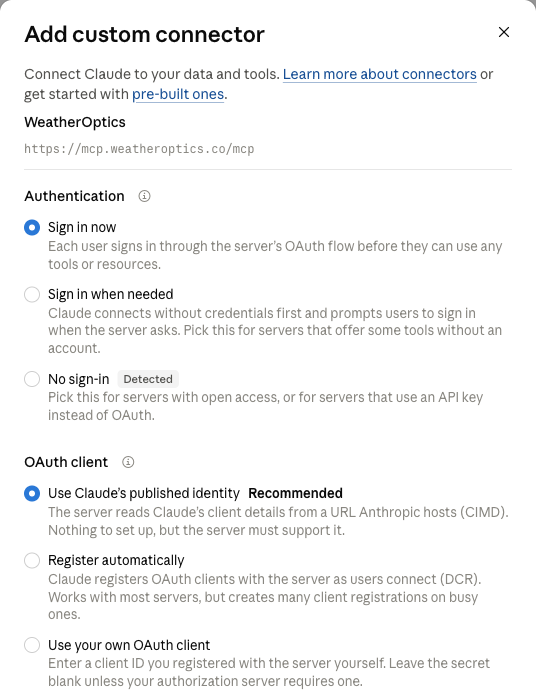
https://mcp.weatheroptics.co/mcp3 Choose Sign in now, then click Add
Under Authentication, Claude pre-selects No sign-in and marks it Detected. Change it to Sign in now. (WeatherOptics lets Claude read the tool list before you sign in, which is what Claude's check picks up. Your data always needs your WeatherOptics sign-in.)
Leave everything else as it is: OAuth client stays on Use Claude's published identity, and Request headers stays empty. Click Add at the bottom of the dialog.
4 Connect your WeatherOptics account
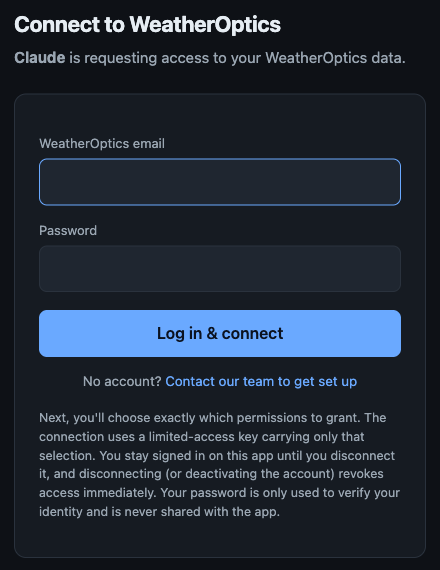
Claude opens the new connector's page with a Connect button. Click it. A WeatherOptics sign-in page opens: enter your WeatherOptics email and password and click Log in & connect.
Then choose what Claude may access: weather & risk data, route planning, and/or your saved assets. You can grant everything or just a subset; every tool stays listed, and one you haven't granted replies with which permission it needs instead of failing silently. Click Connect. Claude shows Connected to WeatherOptics.
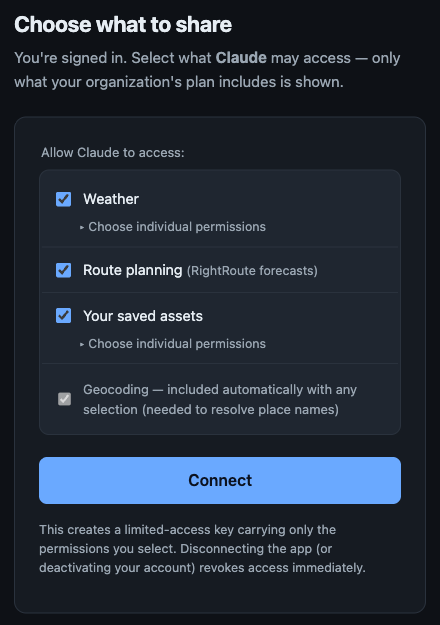
To change what's shared later, click Disconnect on the connector page and connect again; the permission picker runs again.
5 Let the tools run without asking
The connector page lists the tools under Tool permissions, all set to Needs approval, which makes Claude ask before every WeatherOptics lookup. Every WeatherOptics tool only reads data, so set both group dropdowns, Interactive tools and Read-only tools, to Always allow.
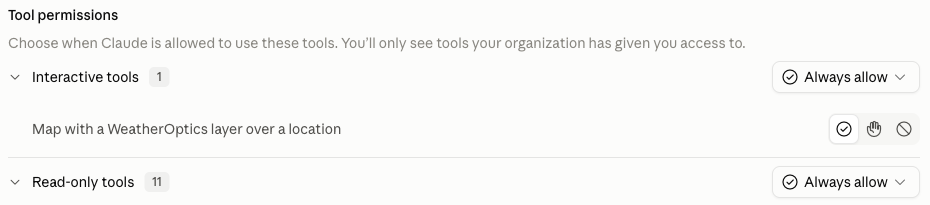
Optional: if you skip this, click Always allow on each tool the first time Claude asks to use it.
6 Test it in a new chat
Open a new chat, attach an asset CSV (or just name a place), and ask:
Using WeatherOptics, which of my attached warehouses are at risk over the next 7 days?Getting updates
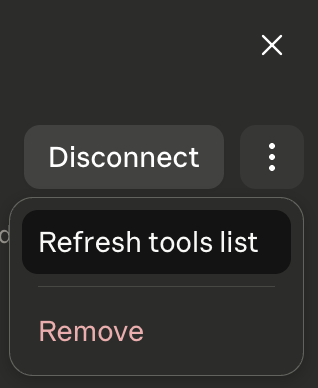
Whenever the WeatherOptics team ships a server update: Customize → Connectors → click the WeatherOptics connector → the three-dots (⋮) menu → Refresh tools list.